At a wedding you move from the church to the garden in seconds, and sometimes the white balance stays behind. With a normal file a wrong white balance is often a lost clip. I wanted to see how far Nikon ZR R3D can go, so I shot an outdoor clip at 3200K on purpose: completely wrong for daylight.
The clip as shot
Blue, cold, unusable as it is. With a baked-in codec this is the shot you delete.
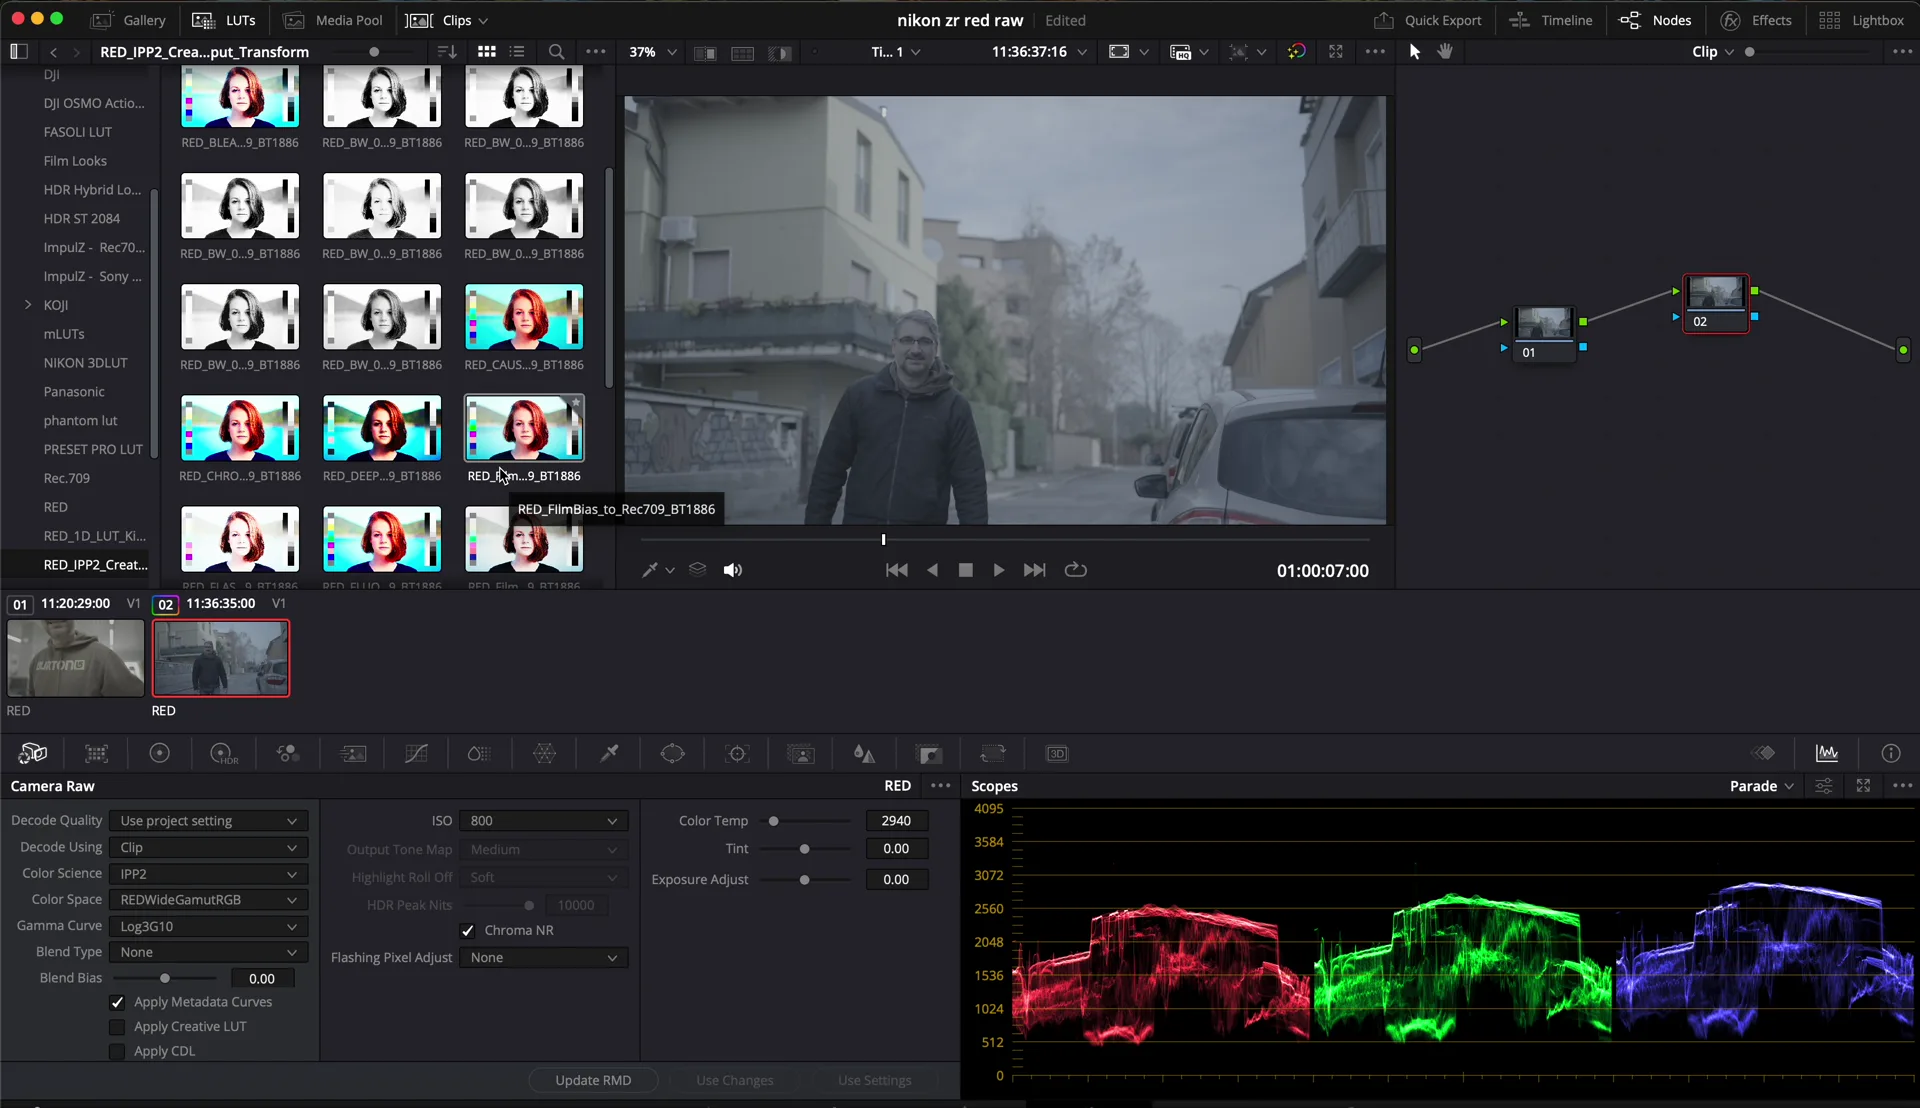
The fix in DaVinci Resolve
- Apply your LUT. I use the FilmBias LUT on my Nikon ZR clips.
- Set the white balance back in the RAW settings, where the Kelvin value is still fully editable.
- Lower the exposure a little.
Two adjustments and the clip is saved. Because white balance in RAW is metadata, changing it is not a correction on top of a damaged image: it is like choosing it again on set.
Why I shoot RAW at weddings
I do not plan to get the white balance wrong. But on a wedding day, when it happens, R3D gives me the safety net. That is worth the bigger files, and there are ways to manage those, like exporting the graded clips to H.265.
Quick recap
- In R3D, white balance is still editable after the shoot.
- LUT, Kelvin back in place, exposure down: clip saved.
- RAW is the safety net for fast-changing light.
Watch the video
The short version is on YouTube Shorts. More on my YouTube channel.
Nikon ZR in R3D RAW, graded in DaVinci Resolve. Words and video by Alex Sofo.
[…] The same RAW flexibility saved a clip with the wrong white balance: read how. […]