For a long time, if you shot RED RAW you basically had to grade in DaVinci Resolve. Now Final Cut Pro has the RED plugin, and the Nikon ZR R3D files open directly in the timeline. I spent an evening testing it on real wedding-style clips. Here is what works and what does not.
Where to find the RAW settings
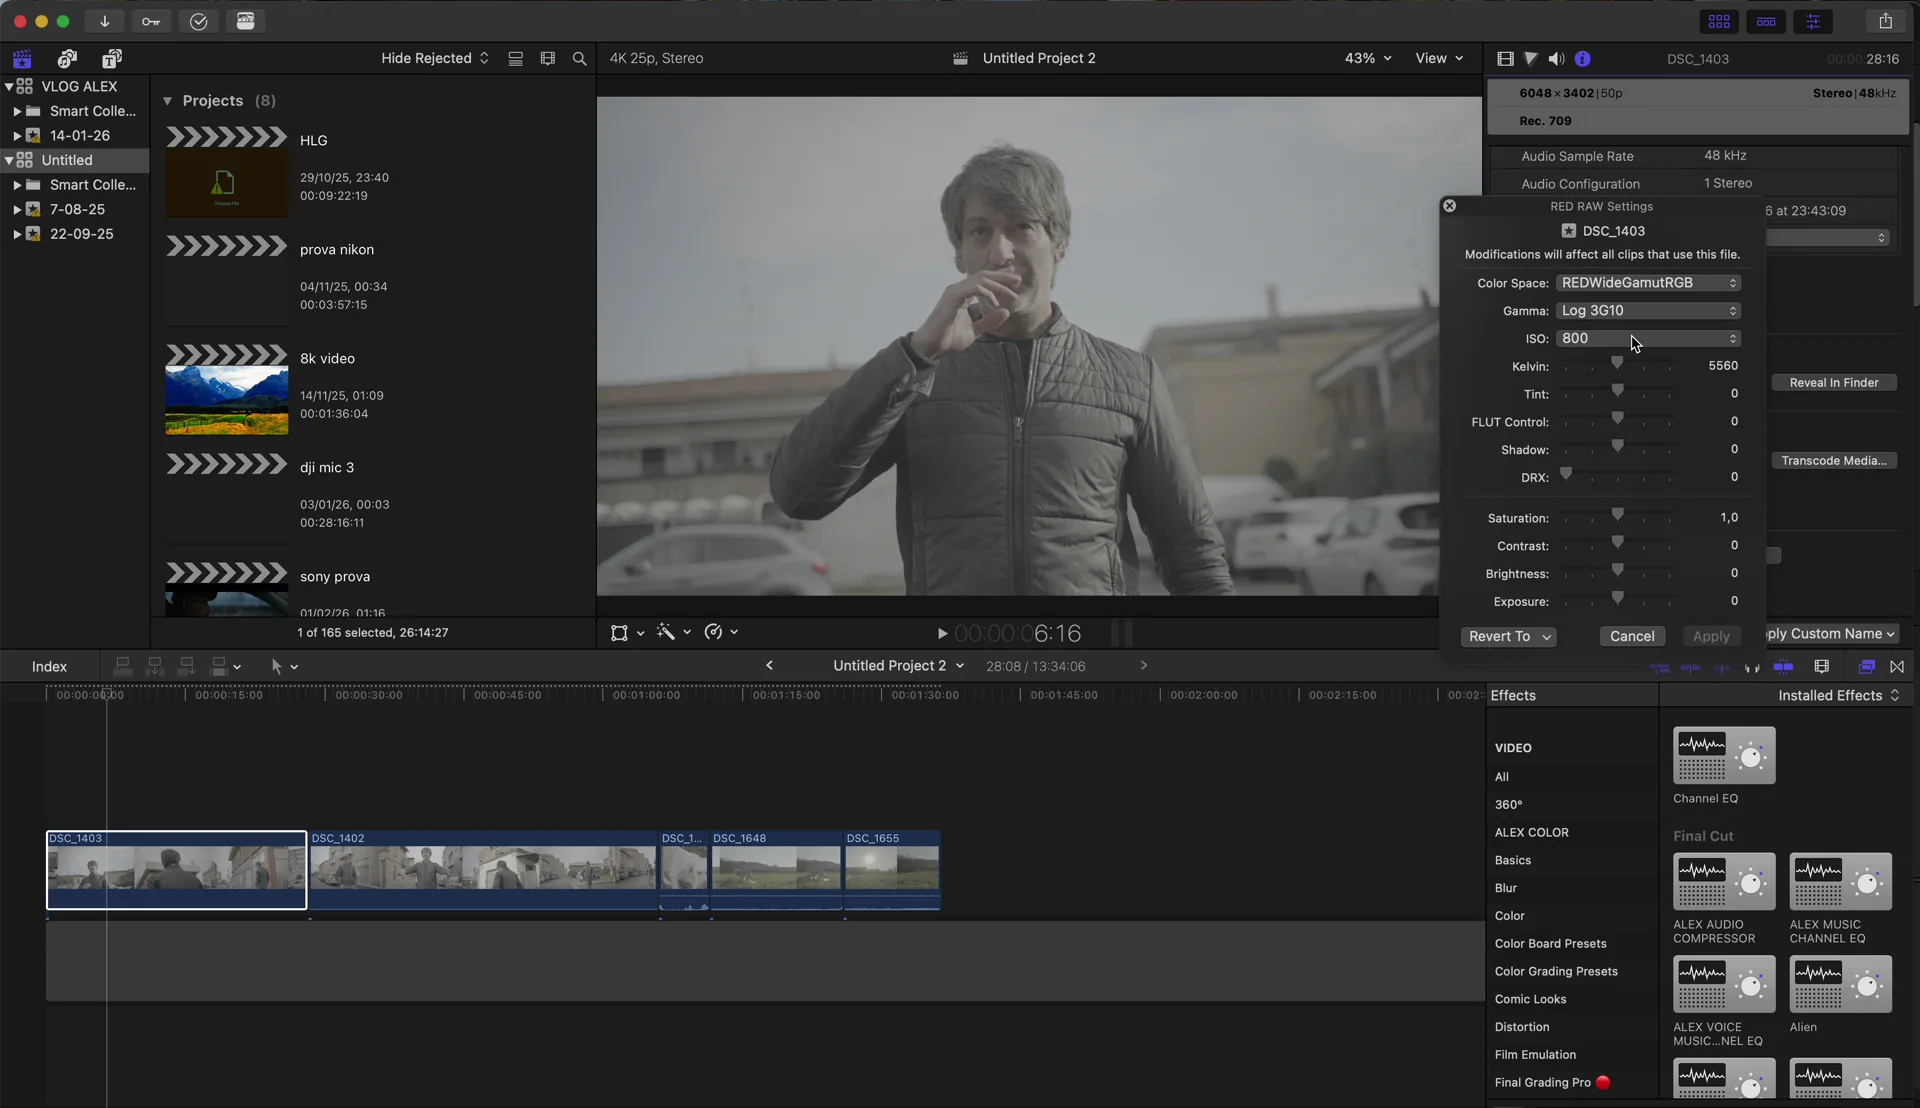
Select the clip and open the Inspector. In the info tab you get the RED RAW settings: ISO, Kelvin and tint. You can also load your own LUT directly on the clip, so a camera LUT or a creative LUT can be applied at the source.
What does not work (yet)
Exposure, brightness and shadows are greyed out. In my tests the only RAW controls that really worked were Kelvin, tint and contrast. For a quick edit that is enough: fix the white balance, add a LUT, cut. For a real grade with exposure work, noise reduction and power windows, DaVinci Resolve is still more complete.
How I use it
- Fast jobs and previews: R3D straight in Final Cut, white balance in the Inspector, LUT on the clip.
- Important jobs: grade in DaVinci Resolve, then export H.265 and edit in Final Cut.
Quick recap
- The RED plugin opens R3D natively in Final Cut Pro.
- ISO, Kelvin, tint and LUT are in the Inspector.
- Exposure, brightness and shadows are disabled.
- For full control, DaVinci Resolve still wins.
How I convert graded R3D to light files: R3D to H.265 in DaVinci Resolve.
Watch the video
The short version is on YouTube Shorts. More on my YouTube channel.
Nikon ZR R3D files in Final Cut Pro with the RED plugin. Words and video by Alex Sofo.