Shot on Nikon ZR + Blazar Talon 35mm anamorphic. Edited by AI. Here’s exactly how it went.
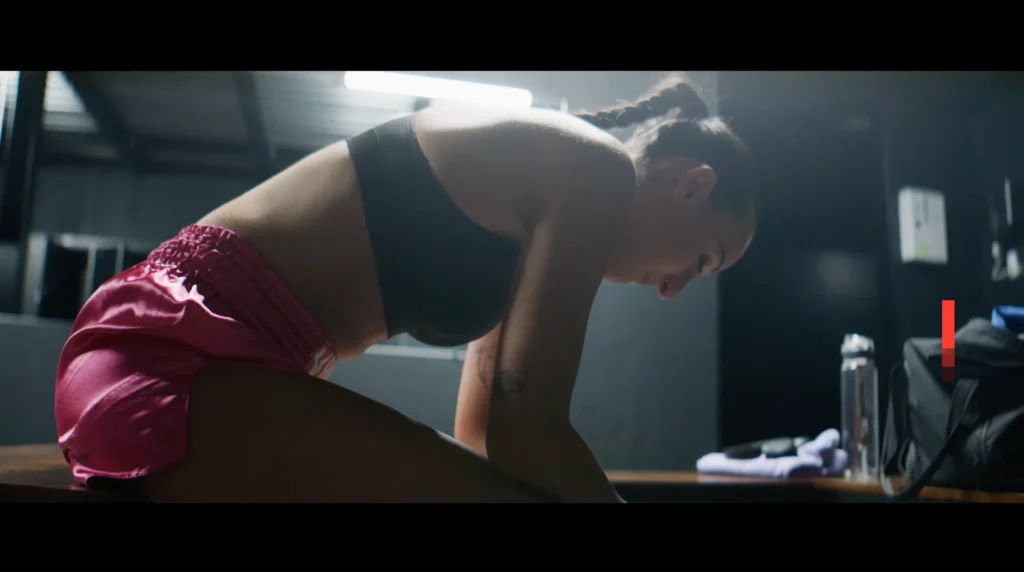
I’ve been filming weddings for years, and I edit everything myself. So when AI tools started connecting directly to DaVinci Resolve, I wanted to see what one could do with my own footage. Not a fake AI-generated video: real footage I shot, handed to Claude AI, which then built the edit inside Resolve.
The subject was New Action Gym in Senago, a kickboxing and functional training gym where I’d already filmed a series of training videos. The goal was a 60-second, high-energy promo.
The footage: Nikon ZR + Blazar Talon 35mm anamorphic
I shot everything myself, as always:
- Camera: Nikon ZR, RED RAW, 4K at 50fps and 6K at 25fps
- Lens: Blazar Talon 35mm anamorphic (1.5x squeeze) on a Megadap ETZ21 Pro adapter
- Edit files: 10-bit 4:2:2 H.265 at 4032×2268
The anamorphic look was the starting point. Oval bokeh, horizontal flares and a wide frame make a gym under artificial light feel cinematic instead of a phone clip. If you want to know more about the lens itself, I wrote a full test of the Blazar Talon on the Nikon ZR.
Step 1: The prompt
Everything started with a written brief to Claude: a 60-second promo for the gym, aggressive and rhythmic, cut to the music, with on-screen text pushing the gym’s values, and a cinematic widescreen look that fits the anamorphic footage.
No storyboard and no shot list. Just the footage folder, the song and the brief.
Step 2: Claude working inside DaVinci Resolve
Claude didn’t export a list of suggestions for me to apply. It worked inside DaVinci Resolve Studio on my Mac through Resolve’s scripting API: it created the timeline, placed clips, stacked tracks and set framing.
The timeline it built:
- 4K UHD (3840×2160), 25fps, exactly 60 seconds (1,500 frames)
- DaVinci Wide Gamut / Intermediate color management, Rec.709 output
- 4 video tracks and 4 audio tracks, each with its own job
Step 3: Cutting on the beat, 72 cuts in 60 seconds
The main video track has 72 shots. Most land every 20–21 frames, about 0.8 seconds, locked to the rhythm of the song. In the final section the pace doubles to 10-frame cuts, so the promo speeds up toward the end card.
On some shots Claude added a 1.12x punch-in to tighten the framing and make the shots feel more aggressive, while keeping the anamorphic aspect.
Step 4: The music
The track is “Paid My Dues” by NF: dark, driven, and a natural fit for fight training. The edit is built around the drop at about 10 seconds. The first 10 seconds are the intro, introducing the gym and two of its athletes, Simone and Alissia. Then the song explodes and so does the edit.
Step 5: Sound design in three layers
This is the part that surprised me most. Under the music, Claude built three separate audio layers:
- Natural sound from the footage: 45 short audio clips cut from the original files, mostly punches, kicks and pad hits, placed exactly on the matching frames.
- Transitions: whooshes panned left and right, a riser building into the drop, and hits on every text slam.
- Impact and texture: glitch sounds on the intro logo, a reverse “suck” into the drop, and booms on the three big moments (the drop, the statement and the end card).
Most viewers wouldn’t notice any of it on its own, but without it the promo would feel flat.
Step 6: Motion graphics
Claude also created the graphics as ProRes 4444 files with transparency, ready to sit on top of the footage:
- Animated intro logo (first 3 seconds)
- Name cards for the athletes
- “Slam” words, one per beat, in Italian: FORZA, VELOCITÀ, PRECISIONE after the drop, then SUDA, LAVORA, COMBATTI, RIPETI, PRONTO in the finale
- HUD overlays on the exercises: squat, curl, hip thrust
- Four combo graphics on the kickboxing sequences
- A statement card halfway through
- An end card with the gym’s branding
- White flash frames on the four main hits
Step 7: The cinematic frame
The final layer is a 2.39:1 letterbox over the full timeline. With the 1.5x anamorphic footage, that gives a true widescreen look.
The structure, second by second
| Time | What happens |
|---|---|
| 0:00 – 0:03 | Animated logo, glitch sounds |
| 0:03 – 0:10 | Athlete name cards, riser building |
| 0:10 | Drop: flash, boom, FORZA / VELOCITÀ / PRECISIONE |
| 0:13 – 0:25 | Training sequences with HUD overlays and combos |
| 0:28 | Statement card, second boom |
| 0:33 – 0:47 | Kickboxing combos, beat-synced cuts |
| 0:48 – 0:57 | Finale: 10-frame cuts, SUDA / LAVORA / COMBATTI / RIPETI / PRONTO |
| 0:57 – 1:00 | End card, final flash and boom |
What the AI did, and what it didn’t
Claude handled the editing: shot selection, cutting to the beat, sound design, graphics and timeline structure, in a fraction of the time it would have taken me.
But it didn’t shoot anything. The light, the framing, the choice of an anamorphic lens, being in the gym and knowing when the athlete was about to throw the right kick: all of that came from behind the camera. AI can work with good footage, but it can’t create it.
For short, rhythmic, social-first content like this, it’s a powerful tool. For a wedding film, where the story depends on emotion, voices and moments only I saw on the day, I still edit everything by hand. That’s not changing.
Thanks to New Action Gym
Thanks to New Action Gym in Senago (Via Togliatti 28/E) for opening their doors again. If you’re near Milan and looking for kickboxing or functional training, check them out at palestranewaction.it or on Instagram @palestra_new_action.
More Nikon ZR experiments: Sony FX5 vs Nikon ZR hands-on · Hiking in Nikon ZR RAW
Need a promo for your brand, gym or business? Get in touch.